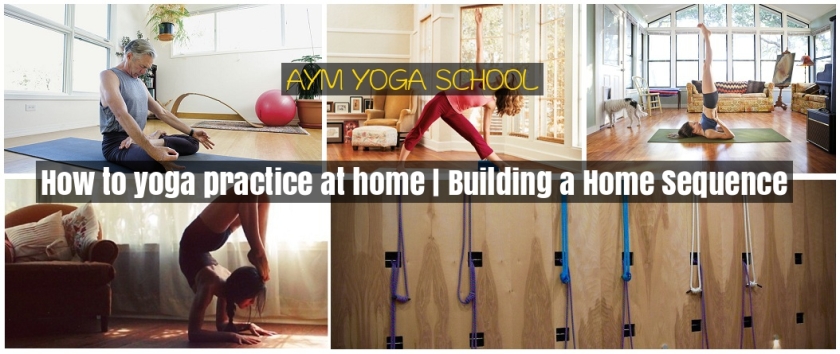
Doing an open home yoga practice is a ritual for yoga practitioners. It is a fact when you actually learn to move at your own set speed, listen and respond to the body, and develop more speed and consistency in your yoga practice. Like getting a driving license and self-practicing enables you and gives you freedom to explore things. The freedom of getting behind the wheel for the first time can be overwhelming until you learn to operate the driving wheel and its tools, and are able to drive from one place to another.
Though practicing yoga at home sounds very easy but even experienced practitioners can be unsure when it comes to choosing poses for practice, and how can be done in a sequential order. This is the most effective and powerful tool used by experienced teachers at all times for teaching unique and transformative classes. Though, there are many other ways of doing sequencing in contemporary hatha yoga. Mastering the art of sequencing takes years of study, but learning some key basic points can help you start building the sequential order of yoga poses that you can then practice with full confidence at your home.
The best way of creating your own home sequence is to memorize and familiarize some basic patterns that can be modified or changed in different ways. In the upcoming pages, you will find the starting points for a well-shaped sequence made up of 8 poses namely- opening poses, standing poses, sun salutations, forward bends, backbends, inversions, twists and closing postures, ending with Corpse Pose (Savasana).
In the elementary sequence, these poses progress according to the strength and the amount of preparation required to do them. Each pose prepares your mind and body for the next one, which in turn make you feel that your yoga practice has a set beginning, mid-part and an end that makes it flow effortlessly from start to end. By following this approach, you will be able to create your own sequence that will make you warm and safe slowly, will build your core strength before going for challenging postures, and will then slowly bring you back to a quiet and relaxed pose in the end.
Consider the upcoming sample sequence as the starting point from where you can make changes in your practice according to your mood and requirements. You can change or modify poses in every category, and can make your practice long or short according to the time. Once you get the basic understanding of categories of different poses, you will start noticing their energetic effects on your body. After this, you can start your experimentation with creating your own sequences that will suit your body according to its requirement. It can either be focusing on a particular part of your body or working on a challenging pose to make it a bit easier to do.
Opening Poses
Why do them? The starting poses of a sequence awaken up our major muscles and provide a phase of transition from your busy daily schedule to a more internally focused one for your yoga practice.
The Method: Include a few physical movement that constantly warms your body, a breath-awareness component, and a contemplative element that assists you to direct your attention to what is happening inside your heart and mind. A simple way to do this is to start with some minutes of seated meditation.
Next, take some poses that slowly warm the major muscle groups of your body. Your practice puts a significant demand on your shoulders, spine, and hips, so it’s a good idea to incorporate 2 to 4 postures that gently wake up one or more of these regions. Since intestinal stability and awareness are important for all of your poses, you could also pick to start with some core strengthening poses to wake up your center. As you become more intuitive and experienced, you may decide that you are going to focus on a specific area of your body in your practice, such as your outer hips, and let that affect your choice of opening poses. For instance, in a hip-focused practice, you might pick to open with Pigeon Pose (Eka Pada Rajakapotasana), Cross-Legged Forward Bend, and Cow Face Pose (Gomukhasana).
In this sample sequence, you will focus on opening your shoulders while seated in Virasana (Hero Pose), which stretches the fronts of your thighs and affords you with a stable posture while you open your upper body. But even more important than preparing a specific organ of the body at this stage is initiating an all-around transition to practice for your mind, and body.
Sun Salutations
Why Do Them? Sun Salutations, or Surya Namaskar, pick up where opening poses leave off, warmth the entire body, generating invigorating, and integrating breath and movement. Their hypnotic, thorough movements soft the mind and prepare the body for the postures that follow.
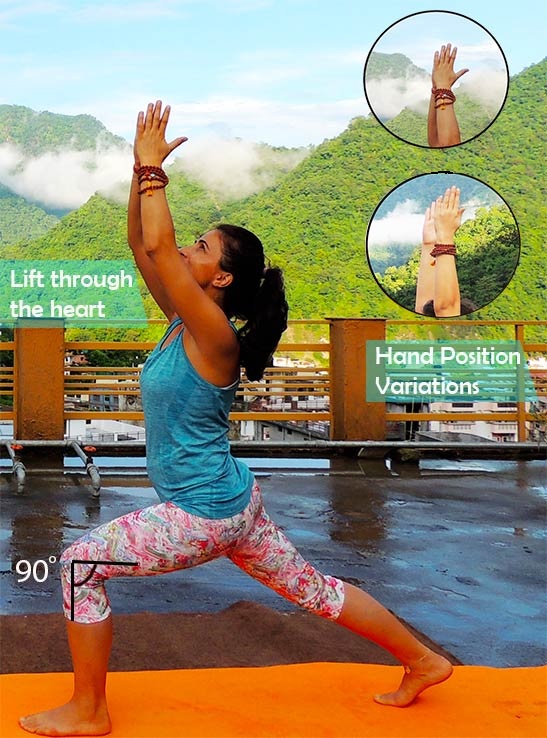
The Method: Tailor your practice by deciding which Sun Salutations you wish to practice, the pace at which you wish to move, and how many rounds you want to do. If you want to begin focus and slowly on stretching the front of your hips, start with a Sun Salutation (Surya Namaskar) that includes both High Lunge and Low Lunge (Anjaneyasana). If you want a more active, heating practice, you might begin with Surya Namaskar A and B, in which you jump through the transitions rather of stepping through them.
Every movement in the Salutation should last the duration of an inhalation or an exhalation. Depending on your energy, and time, you can vary the number of Sun Salutations that you do as few as 1 or 2, or as many as 15. It is a good idea to warm the body thoroughly with Sun Salutations before you do standing postures so that your legs and hips are ready.
Standing Poses
Why Do Them? Standing poses build strength, stamina, and flexibility throughout the entire body. They work the major muscle groups, such as the hamstrings, gluteal, quadriceps, and core. Standing poses often precede twists, backbends, and forward bends in a sequence because they are so capable of preparing your body for these poses.
The Method: It is a good idea to include at least four standing postures in each sequence. There are various ways to hold the order of the postures you adopt, but a tried and true method is to select poses whose actions complement each other. For instance, Virabhadrasana I (Warrior Pose I) and Virabhadrasana II (Warrior Pose II) rotate the pelvis differently so that when they are connected, they create a balanced action. Similarly, Parivrtta Trikonasana (Revolved Triangle Pose) & Utthita Trikonasana (Extended Triangle Pose) complement each other by stretching opposing muscle groups.
Another process is to tailor the standing poses in relation to the postures you will be doing later. For instance, if you want to emphasize on twists in your practice, you would want to do standing postures that include twists, like Revolved Side Angle Pose (Parivrtta Parsvakonasana) & Parivrtta Trikonasana (Revolved Triangle Pose).
Inversions
Why Do Them? Getting upside down is one of the main points of a well-rounded practice. Adho Mukha Vrksasana (Handstand), Salamba Sirsasana (Headstand) and Forearm Balance stretch and strengthen the upper-body and facilitate circulation in the upper terminus. These poses are appealing to the nervous system and are physically demanding; thus they can be the dynamic peak of your practice. (While Shoulder stand is an inversion, it is a much less vigorous and less heating pose, so in this string, it is practiced at the end with the closing postures.)
The Method: If you’re not familiar with these inversions, it is important to learn them under the direction of an experienced teacher before practicing them at home. If you are not ready for Handstand, Forearm Balance, or Headstand, simply skip this section or take a long Downward-Facing Dog. Depending on your comfort level, time, and strength, you can repeat Forearm Balance and Handstand a few times. If you are practicing Headstand, do it once per practice and stay as long as you can.
Backbends
Why Do Them? Along with inversions, backbends from the peak of the intensity curve in this sequence, since these are difficult postures that require a strong degree of effort. Backbends extend the front of the body, strengthen the back of the balance and body the effects of time spent sitting in chairs. Most people find back bending postures stimulating, so you might adopt to emphasize backbends in your practice if you want a burst of mental and physical energy.
The Method: Begin with prone (face-down) backbends like Cobra Pose (Bhujangasana) or Locust Pose (Salabhasana). Since prone postures strengthen & warm your spinal muscles, they are a good establishment for supine (face-up) poses, such as Bridge Pose (Setu Bandha Sarvangasana), which create a greater range of movement in the shoulders, spine, and hips. It’s a good idea to repeat each pose 2 or 3 times since most bodies will require a few rounds to open completely.
Poses for Winding Down:
Twists
Why Do Them? Twists allay tension in the spine, hips, and shoulders, and they gently stretch your hips and shoulders. These poses commonly produce a balanced energetic tone that is closer to the grounding quality of forward bends than the incitement nature of backbends. Planting them between backbends and forward bends in a sequence assist the spine in transitioning between these 2 extremes.
The Method: Twists encompass a broad spectrum of postures, including standing, reclined, inverted, and seated, variations. In a well-balanced sequence like the one below, it’s nice to include 2 to 4 twists.
If you consist of standing twists like Revolved Triangle Pose (Parivrtta Trikonasana) or Revolved Side Angle Pose (Parivrtta Parsvakonasana), do them first; standing twists are the good formation for seated twists. When you practice seated twists, begin with a calm, accessible twist like Bharadvaja’s Twist (Bharadvajasana) before proceeding to more intense twists like Marichi’s Pose (Marichyasana III). If you’re looking for a long, slow, soothing twist that will relax your nervous system and settle your energy, you might choose to practice a reclined twist here.
Forward Bends
Why Do Them? Forward bends typically have a mild effect on the mind, emotions, and nerves, which is why they’re generally practiced toward the end of a sequence. These postures facilitate deep relaxation by stretching the muscles of the back and decreasing the incitement of the sensory organs.
The Method: When choosing forward bends, it’s ideal to choose at least one posture that stretches the hamstrings, like Head of the Knee Pose (Janu Sirsasana), and one that opens the outer hips, like Cros Legged Forward Bend. This will promote greater balance in your body by building more range of movement in both regions. Settle into both postures for 8 to 10 slow, smooth, relaxed breaths.
Closing Postures
Why Do Them? Closing postures complete a sequence by softening the mind and relaxing the body. While opening postures focus on waking up the body and building momentum for the practice to come, the closing postures help you surrender and absorb the practice.
The Method: To get the full benefit, you’ll want to spend at least 6 to 10 minutes total in these calming postures. There are 4 basic types of closing postures: Supported Shoulder stands (Salamba Sarvangasana), Corpse Pose (Savasana) seated meditation, and restorative poses. You don’t have to include each type in a single sequence (though if you did Headstand earlier, it’s a good idea to include Shoulder stand as a closing posture since the two poses complement each other). And whether you add any other closing postures in your sequence, ending your practice by lying quietly in Savasana is a must.
However, you accustom this sample sequence whether it’s to focus on a particular energetic effect or on a part of the body do not skimp on the closing postures. They’re the key to assimilating the benefits of your practice.
Author: Yogi Chetan Mahesh
Follow us on Facebook